
Single storey rear extension with roof lantern, extensive structural works and internal renovation of the ground floor including kitchen, snug, WC and hallway.

BEFORE

AFTER
Ensuring Customers Get What They Want
Richard and Karen wanted to modernise their family home, improve the ground floor living arrangements and make more of a feature of the garden. They were a bit apprehensive about the whole process having not had any building work done for a long time so enlisted the services of their architect, Russell at BGA Architects, to help assist in the builder selection process.

EXISTING PLANS
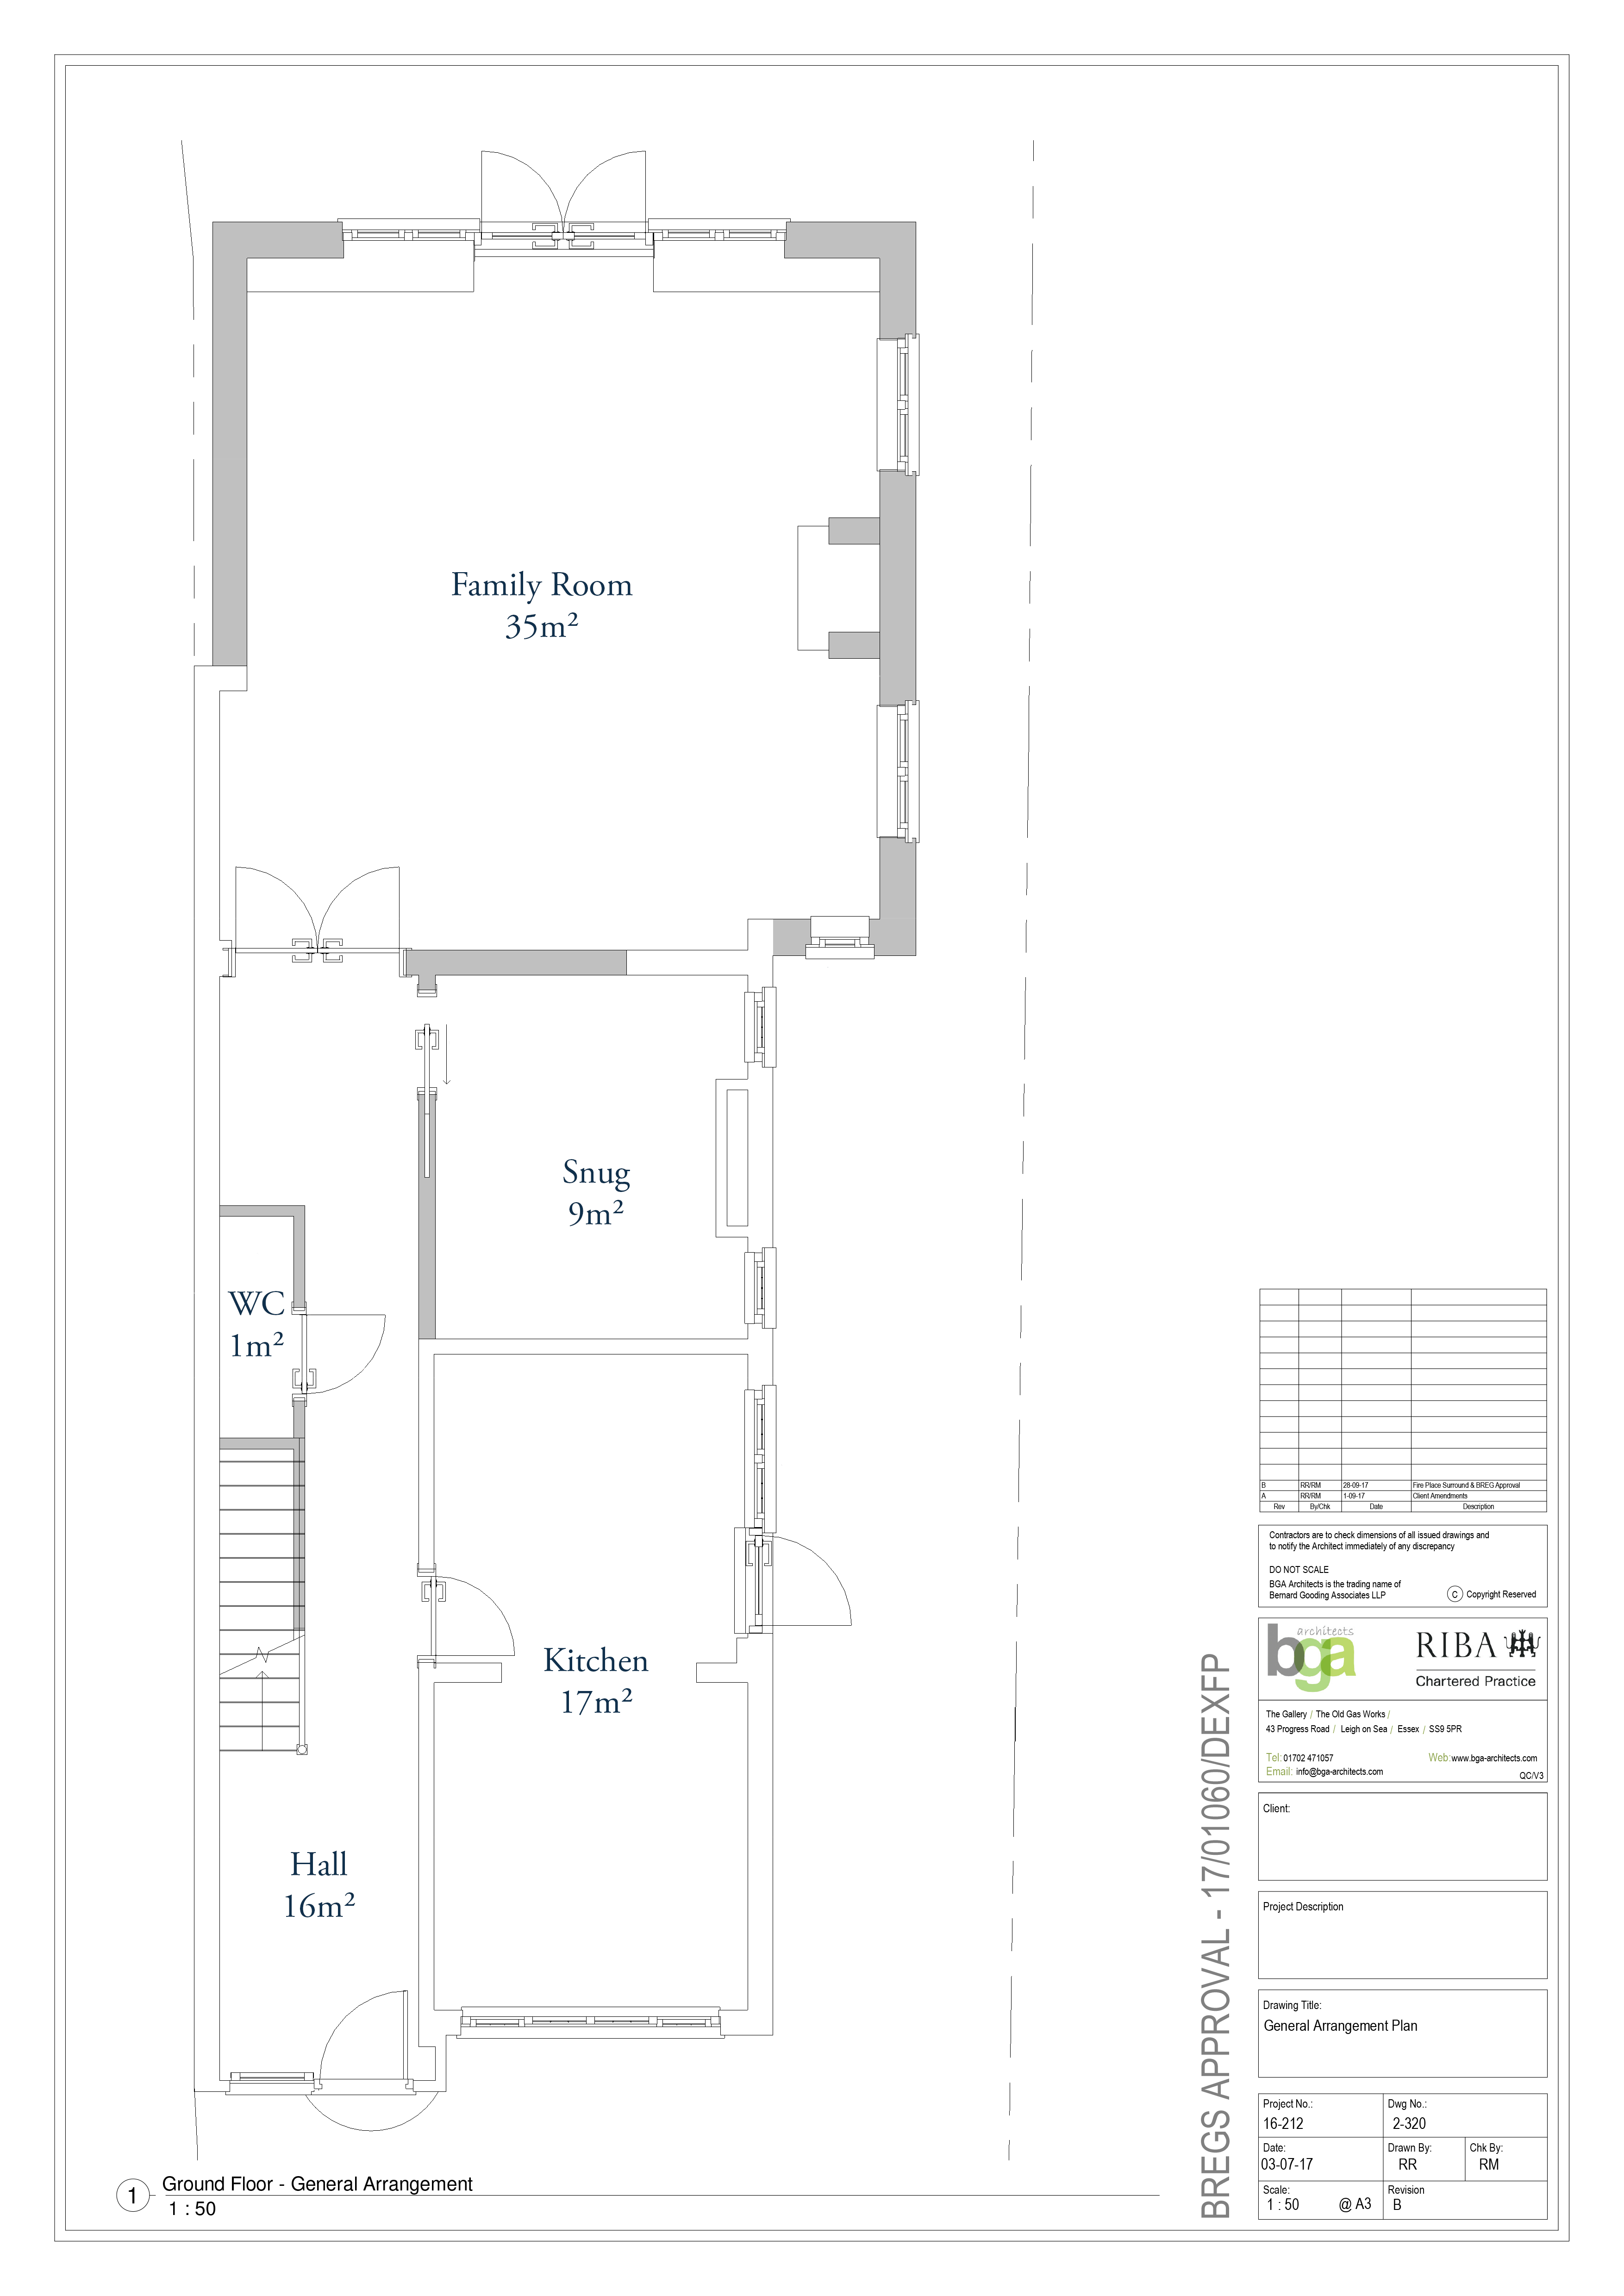
PROPOSED PLANS
After receiving the tender documents from Russell, I initially met with Karen at the house to get an overview of what needed doing. The scope of works involved the following:
- Removal of a garage and an old conservatory that didn’t get used that much.
- Knocking out the rear corner wall and supporting the structure above with steel beams.
- Subdividing off part of the existing living room to make a “snug”.
- Moving the WC to underneath the stairs so as to create a much larger entrance area.
- Fitting a new kitchen and putting in a side door for access.
I went through the process of how we would carry out the works so as to minimise disruption as much as reasonably possible. It was a project I was keen to take on so I went back to the office and set about pricing it up.
Once I had submitted my price, I met with Richard, Karen and Russell at the BGA Architects offices and we went through the quotation to ensure that I had quoted for everything that was required. Once we had formulated a list of minor modifications for me to add in or subtract I was able to finalise the quotation ready for signing contracts.
Survey & Design
One of the first things we do when attending site on the first day of construction work is to carry out a survey of existing heights and levels using a rotary laser level. We also set a datum level which allows us to measure from a fixed reference point throughout the build ensuring simple errors are avoided.


Once we have a reference point we create our own set of section drawings taking into account heights of floors at various points (most older houses will have some degree of out of level floors), window and door frames and any services we need to be aware of.
It came to our attention that the previous mansard roof extension wasn’t exactly square with the rest of the property. Normally this wouldn’t have been an issue, but because we needed to install steel beams beneath it and from those, support the beams that hold up the roof lantern, we needed to make one of the lantern beams slightly longer to avoid the opening being out of square with our work. These are the sorts of issues that some builders miss and wonder why things don’t look quite right.
Demolition & Groundworks
Once the survey was complete and we had set up site with our signage and driveway protection we made a start on getting the existing conservatory and garage cleared. The client had told us that the garage had an asbestos roof so this was removed without breaking the panels and a specialist removal company came to collect and dsipose of it properly. The ground conditions on this site were a heavy clay so we had to install a claymaster board on the insides of the foundations to allow for expansion and contraction of the ground.


Ground Floor & Brickwork
Following the concrete pour the foundation masonry was laid and the beam and block floor fitted. The bricklayers then made a start on building the block walls.


Roof Timbers & Steels
The main steel across the back of the house was inserted along with the lantern steels and roof timbers. Once the roof was watertight and the glazing installed so that the structure was secure, then we were able to remove the old walls below the newly insterd steels which opened up the room beautifully.


Glazing
The roof lantern was originally going to be 2 smaller units but we recommended they went with a larger single unit because it would actually work out cheaper and provide more light to a space that would certainly benefit from it.


Screeding, Drylining & Plastering
Once all the electric cables and pipes had been fitted we could screed the floors and start fitting the plasterboard to the ceiling and walls ready for plastering.


Decorating, Rendering & Landscaping
Because space was a bit tight in the property, we had to finish the decorating in the extension so that we could move all the furniture back out of the snug before we started work on that area. While the decorator was doing his work we made a start on the external rendering and patio area. The client opted for a pastel green coloured render which I think looked really good. The slabs were Raj Blend Indian sandstone.


Completion


